Tuesday, October 9, 2012

Bread.. Bread... and more Bread....

So I am just about finished with my second 4 week class. This class was my baking class and I learned so much about bread baking. This 4 week class we have made so far is beer ranch bread, potato bread, pane toscano, chocolate chip cookies, and pita bread. We will be making sour dough bread and pie crusts later on this week.

Now the beer bread was my least favorite of the breads I have made in this 4 week class. My favorite one is a tie is between the pita bread and the pane toscano. 


 (Pane Toscano)
(Pita Bread)
(Potato Bread)
 The breads were easy and hard depending on the day. I think the one that surprised me the most was the pita. It was so much easier than I would have ever thought it would be. I love using pita's and now that I know how to do it I will never buy them from the store. 

Pita Bread Recipe

Yields: 2lbs 12oz

Tools:

Mixer with Dough Hook
Measuring Spoons
Measuring Cups
Large Bowl
Pan Spray
Parchment Paper
Cookie Sheet
Plastic Wrap

14 oz Water, warm not hot
1 oz Yeast
1 lb 4 oz Bread Flour
4 oz Whole Wheat  Flour
0.5 oz Salt
0.67 oz Sugar
3 oz Yogurt, Plain
1 oz Olive Oil

Directions:

Pre-heat oven to 450°F. Place cookie sheet upside down while pre-heating. 

Mix the water with the yeast. Then add sugar and mix. Let the mixture sit for 5 minutes. Then add the flour, salt, yogurt, and olive oil. Mix with a dough hook until combined and pulls away from the mixing bowl. 

Spray the large mixing bowl with pan spray and put the dough in that bowl and cover with plastic wrap. Let it rise for 1 1/2 hours. 

Punch down the dough and knead until smooth. Weigh out 7-6 oz portions and roll out as thin as possible. You will need some extra bread flour for rolling out the dough.

Place the pita dough on the parchment paper and bake for 5-7 minutes or until golden brown and puffed up. Cover the pitas once done so they will not dry out. 


Tuesday, August 28, 2012

Back in School

I had the summer off from school but really didn't cook that much. I was lacking in inspiration for food. This semester is going to be extremely busy because of class from 7:30am till 1:30pm Monday through Friday. I am going to try and write about my experiences in class and at home trying new things more often. Now lets get on with the show. 

Today was the second day of class, the first of many in the kitchen lab. It was exhausting and frustrating because I felt like I was so far behind everyone. To start off I had to make 4 different salad dressings from scratch, which 2 required mayonnaise and of course I had to make that by hand as well. Its amazing something that requires little effort to go pick up in the store can be so time consuming and have that many ingredients.

But of course tomorrow is a new day and the first day of service. Yes service, did I forget to mention that? Yes the culinary program actually has a dining room that we do serve the public. So it will be interesting day tomorrow, wish me luck!


Sunday, April 29, 2012

Teriyaki Turkey Burger with Grilled Pineapple and Peppers

My husband and I had a grilled teriyaki chicken breast burger with pineapple at a restaurant. It was so yummy but I would have preferred it ground, just for easier eating. So I decided to make my own version of this burger at home. 


Tools:


2 Mixing Bowls
Grill or Grill Pan
Knife
Cutting Board
Pineapple Corer(Optional)


Ingredients:


1 lb Ground Turkey
1 Egg
1/2 C Bread Crumbs
1/2 C Teriyaki Sauce
1 Red Bell Pepper, Sliced in rings
1 Medium Onion, Sliced in rings
1 Medium Pineapple, Cored and Cut in rings
Pinch of Salt
Pinch of Black Pepper
Buns for burgers
1 Tbsp Oil, for grill


Directions:


Put 1/4 C of teriyaki sauce in mixing bowl with onions, peppers, and pineapples. Let it marinate while getting the meat together. 


Put ground turkey, 1/4 C teriyaki sauce, egg, and bread crumbs in a mixing bowl.  Add the salt and pepper and mix until combined, be careful to not over mix. Make into 4 to 6 patties depending on the size you want. Rest for 5 to 10 minutes before cooking so the burgers hold together. 


Heat up grill or grill pan on medium high heat. Oil the grill pan and start by grilling the peppers, onions and pineapples. 


Then grill the burgers until completely brown through the center, flipping only once.  Then assemble the burger and serve with fries or potato wedges.


 Enjoy!

Saturday, April 28, 2012

Cinnamon Candied Nuts

I always love these candied nuts that I would get at the fair. I had always wanted to know how they made them. I saw something on the cooking channel where they were making a vanilla candied almonds. I was inspired to try and make my own version with the spices I thought they used at the fair. 


Tools:


Sheet Pan
Silicon Mat or Parchment Paper
Mixing Bowl
Kitchen Aid Mixer and Bowl
Spatula


Ingredients:


4 C Whole Almonds
4 C Halved Pecans
2 Egg Whites
1 C Sugar
2 tsp Vanilla Extract
2 tsp Cinnamon
1/2 tsp Nutmeg
Pinch of Salt


Directions:


Preheat oven to 300°F. Whisk egg whites and vanilla until fluffy but not stiff. Add the nuts and coat. Then add the sugar, salt, cinnamon and nutmeg and mix until coated.


Pour out on covered sheet pan in a single layer. Bake for 20 minutes then cool for another 20 minutes. 


Break apart and store in airtight container. 


Enjoy!

Friday, April 27, 2012

Cookie Cigars

I have seen these filled cookies on many shows and always wanted to try to make them. I found a recipe that called for Brandy in the recipe but not being a fan of Brandy I just decided to omit it from the recipe. 


Tools:


Silicon Mats
2 Sheet Pans
Whisk
Saute Pan
Measuring Cups
Measuring Spoons
Kitchen Aid Mixer and Bowl
Dowel or Round Handle
Cooling Rack
Pastry Bag
Pastry Tip


Cookie Ingredients:


1 Stick Butter
1/4 C Sugar
1/4 C Brown Sugar
1/2 C Molasses
1 tsp Vanilla
3/4 C Flour
Pinch of Salt
Pinch of Ground Ginger


Directions: 


Preheat oven to 325°F and place kitchen aid mixing bowl in the fridge or freezer(for filling). Heat the butter, sugars, and molasses over medium heat until it bubbles. Cook for 1 minute then turn off the heat. Add the flour, salt, ginger, and vanilla. Stir until the flour is combined. 


Use a tablespoon and pour the mixture on the covered sheet pan. 8 cookies a sheet because they spread out pretty far. Bake for 9 minutes. Cool for 2 to 3 minutes. Lift up circles one at a time. Drape them over the dowel and seal the edge. Place on cooling rack. Continue until the mixture is gone. While cookies are cooling we can make the filling.


Ingredients for Filling:


2 C Heavy Cream
1/2 C Sugar
1 tsp Vanilla 


Directions:


Combine all ingredients into a cold mixing bowl. Mix on high until you get stiff peaks. Place cream into pastry bag with large tip. Fill the cookies only when they are going to be consumed with in a couple hours or they get soggy. 


Enjoy!


Thursday, April 26, 2012

Snowball Truffles

I get these cravings for certain things. Not necessarily to eat but just to make. I had never made truffles but I really wanted to try to make them. I decided to make a version of snowball truffles. These were easy to make but are messy and take some time to make but they are well worth it. 


Tools:


Cutting Board
Knife
Small Sauce Pan
Medium Mixing Bowl
Sheet Pan
Parchment Paper or Silicon Mat
Measuring Cups
Measuring Spoons
Mesh Strainer
Whisk
Plate


Ingredients:


1/2 lb Bittersweet Chocolate
1/2 lb Semisweet Chocolate
1 C Heavy Cream
1 tsp Vanilla Extract
1 1/2 C Powdered Sugar


Directions:


Chop the chocolate into very small pieces. Place them in the mixing bowl. Heat the cream in the sauce pan until it starts to boil. Turn off the heat and cool for 30 seconds. Pour cream over the chocolate through a mesh strainer. Whisk the cream into the chocolate until completely melted. Add the vanilla and whisk to combine. 


Let the mixture rest for an hour at room temperature. Spoon round balls of the mixture onto the covered sheet pan. Refrigerate for 30 minutes or until chocolate is firm.


Roll each dollop of chocolate in your hands to smooth out any rough edges. Then roll each piece in the powdered sugar. They do need to be refrigerated but you can serve them at room temperature. 


They make about 60 truffles, so you will have a ton for the coming weeks. Enjoy!

Friday, April 13, 2012

1st Semester Done!

Wow! That was the fastest 8 week class I have ever taken. It was so busy, I felt like I was always gone. We ended this week with 7, I repeat 7 tests in 3 days! After doing a knife skills test, herb and spice test, then math and vocab test came the big cooking test. 


I was so nervous and stressed because we did not know what we were cooking until 5 minutes before we had to cook the dish. After calming myself down and trying not to stress over it, it wasn't that bad. 


I got a Roast Beef and Cheddar Wrap with Horseradish Mayo with a Macaroni Salad. The first one I had to follow the recipe then the macaroni salad I had to come up with the recipe myself. This all had to be done in 40 minutes. 40 minutes! Ha! I got this in the bag! Pffffttt... Yeah those 40 minutes.... yeah they go by a lot quicker when you are not in a small kitchen and have much more walking to do just to gather your ingredients and tools. 


After getting that finished it was a huge relief to have that finished. I am glad to say I had fun and did well! I can not wait for the next semester start which sadly isn't until August but with more time on my hands I will be creating and posting much more often with recipes! 

Saturday, March 3, 2012

Safety and Sanitation

This course for my culinary schooling is one most people often overlook or do not know the importance of this course. Safety and sanitation is very important for anyone to take. A food born illness takes only 2 people to get sick to be considered an outbreak. That's right, only 2! 


Its amazing at what can make you sick and its also miraculous that most of us haven't died from these illness'. Some are really easy to prevent like salmonella by proper handling and cooking then there are the ones like Hepatitis A that even proper cooking will not destroy the virus. 


The biggest thing I learned from the course is it is the person that is handling the food that is the biggest problem and biggest solution to food illness outbreaks. They can either help fix the problem or make it worse. This course is something anyone working in the food industry should have to take! 


Friday, February 24, 2012

Cioppino

I love seafood like shrimp, mussels, scallops and clams. I have seen Cioppino made and seen it done on TV but never actually tried it. I recently saw in the local grocery store they had live clams, mussels, and fresh halibut. I decided I would make a Cioppino. It is a fish stew that stemmed from San Francisco and it is usually made with what ever fish or seafood you have on hand. This recipe I came up with turned out really yummy, even my 4 year old son ate it! It has a lot of ingredients but is well worth the amount of ingredients.


Tools:


Large Sauce Pan
Cutting Board
Knife
Strainer
Measuring Cup


Ingredients:


1 Filet Halibut
1/2 lb Shrimp
1 lb Clams
1 lb Mussels
1 Onion, diced

3 Stalks Celery, diced
1 Red Bell Pepper, diced
1 Tomato, de-seeded, diced
2 Cloves Garlic, minced
4 Tbs Tomato Paste

1/4 C Sweet White Wine
2 Tbs Olive Oil
2 tsp Black Pepper
1 tsp Red Pepper Flakes
1 Tbs Parsley, minced
2 tsp Salt
64 oz Seafood Stock


Directions:


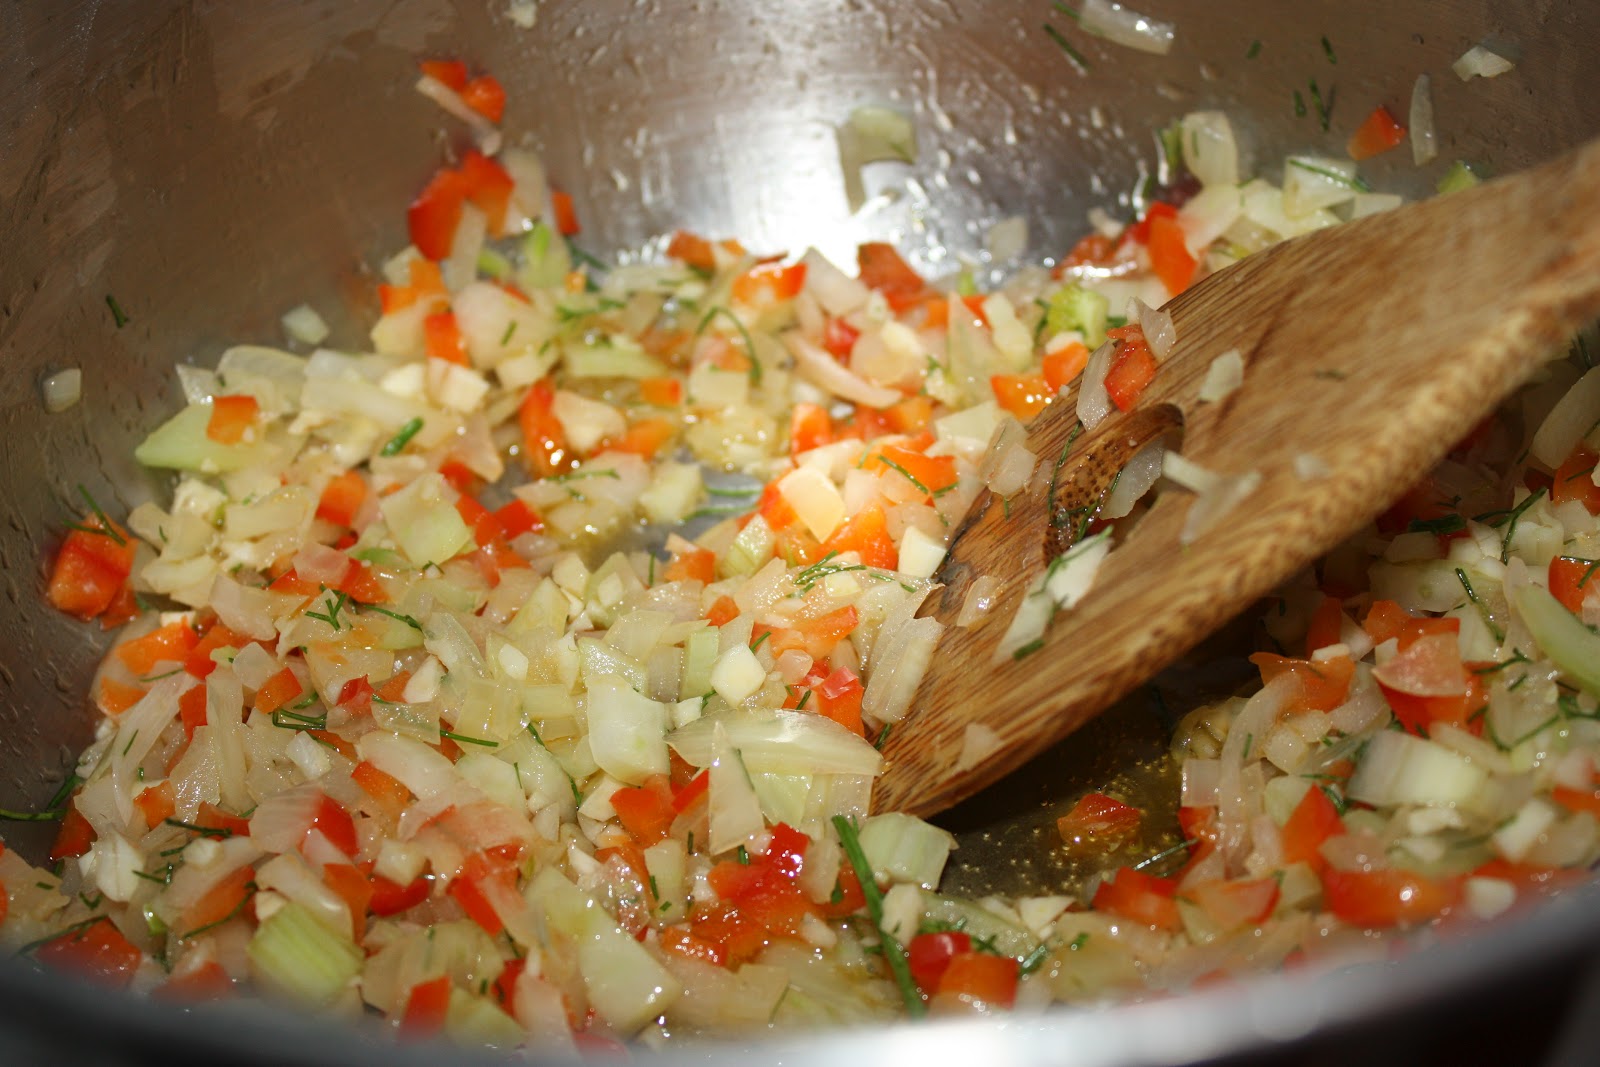
Start by dicing all the veggies, then clean all the seafood. Make sure the clams and mussels have no sand or dirt on them. Heat up the sauce pan with the olive oil over medium high heat. Add the veggies and garlic. Saute until onions are translucent. 


Add the tomato paste. Cook for about 30 seconds and then add the wine. Cook for 2 minutes and add the spices. Then add the seafood stock. Simmer for 30 minutes. 


Then cut the halibut into 2 in chunks. 


Once the 30 minutes is up add the clams and mussels and let them cook for about 7 to 10 minutes. Then add the shrimp to the soup.  Then finally add the halibut to the soup. Let the fish cook for 2 to 3 minutes or until cooked through. 


Once that is finish it is ready to serve, be sure to check the clams and mussels that they are open. The ones that are not open just toss out. 


Enjoy!


Saturday, January 28, 2012

Orange Marmalade

I recently got a bunch of oranges. Now in my house oranges are not eaten by any but myself and having a bunch I didn't want them to go bad so I decided to make some marmalade. I also was making this with one of my family members in mind that has diabetes. I cut the amount of sugar in a normal recipe to an amount that was healthier. This recipe isn't a quick recipe, it does take some labor to complete this recipe. 


Tools: 


Cutting Board
Knife
Medium Sauce Pan
Metal Spoon
Measuring Spoons
Measuring Cups
Mixing Bowl
3 Jars with Lids


Ingredients:


4 Large Oranges
2 Lemons
1/8 tsp Baking Soda
1 1/2 C Water
1/2 C Orange Juice
4 Tbs Sugar
1 1/2 Tbs Low/No Sugar Pectin


Directions:


Cut the oranges into fourths. Remove the peel from the segments, set the segments aside. Remove the white pit with a metal spoon from the peel. You want it to look like the one on the right.


Once the pit is removed you will want to slice in very thin strips. 


Then remove the membranes from the segment of oranges like the one on the right.


Then dice the oranges and 1/2 C orange juice then place them in the mixing bowl and set aside. 


Then place the 1 1/2 C water, baking soda, and strips of orange peel in sauce pan. Heat on medium high heat for 20 minutes covered, stirring occasionally. 


After the 20 minutes add the juice and oranges to the peel mixture. Cook for 10 minutes, stirring frequently, then add the juice from 2 lemons, sugar, and pectin. Bring back to boil and boil for 1 minute. 


Then pull off the heat and pour or ladle into jars or containers and chill. 


Enjoy!

Bountiful Baskets

Bountiful Baskets is something I have mentioned in many of my posts. They have great deals for fresh fruit and vegetables among many other side options available. Their conventional basket is $15.00 for vegetable and fruit. This week there was a tropical pack add on to the conventional basket that was available for $10.50.  


Lets take a look at what $15.00 got me in fruits and veggies.


This had 1 bunch of romaine lettuce, 1 head of cabbage, 4 tomatoes, 6 bell peppers, 4 onions, 7 apples, 3lbs of red potatoes, 7 oranges, 1 bunch of asparagus, 1 container of blueberries, and a huge bunch of green beans.  All of this for only $15.00! 

But even with such a great deal of the conventional basket, the biggest deal was the tropical pack.

Lets see what came with the $10.50 tropical pack. 


It came with 2 mango's, 1 green plantain, 6 kiwis, 4 lemons, 1 coconut, 1 pineapple, 1 large bunch of mint, and 2 vanilla beans. This is such a great deal with just one of the items: vanilla beans. In their vanilla bean pod form they are expensive any where you go. I was at the local grocery store tonight and decided to see the cost of just the vanilla bean.


That is right $11.39 for vanilla beans.... correct that for a single vanilla bean. With bountiful baskets just for one single ingredient saved me at least $12.28 and that doesn't even include the other items that came with the tropical pack. 

Bountiful Baskets is such a great deal for everyone and anyone that loves saving money and eating great fruits and veggies! 


Friday, January 27, 2012

Sage Brown Butter Sauce

This has to be one of the easiest and tastiest sauces for a simple pasta dish. It can be made while the pasta boils. It a quick dinner that can be thrown together if you do not have much time to make dinner. 


Tools:


Sauce Pan
Cutting Board
Knife


Ingredients:


8 Tbs Unsalted Butter
4 or 5 Leafs of Sage
3 Cloves Garlic, minced
Pinch of Salt
Pinch of Black Pepper
2 Tbs Grated Parmesan


Directions:


Heat up sauce pan and melt the butter. Add the salt, pepper, garlic and sage to the butter. Let the butter start to brown then add the parmesan to the sauce. 


Then add whatever cooked pasta you want and toss. Enjoy!

Tuesday, January 24, 2012

Bacon and Brussels Sprouts in a Brown Butter Sauce

I do not remember ever having brussels sprouts when growing up. I know all the jokes about them being the bane of every child's existence. I recently received some in my basket from Bountiful Baskets and wanted to prove to my husband that you can have yummy brussels sprouts. This recipe proved this to my husband so much so he had seconds of it and heated the remaining up the next day! 


Tools:


Medium Sauce Pan
Large Saute Pan
Cutting Board
Knife
Medium Mixing Bowl
Strainer


Ingredients:


4 Strips of Bacon, cooked and crumbled
1 lbs Brussels Sprouts, cooked and chopped into fours
4 Tbs Butter, unsalted
2 Cloves Garlic, minced 
Pinch of Salt
1/2 tsp Black Pepper
1 Tbs Bread Crumbs


Directions:


Heat up a medium sauce pan filled with water until boiling. While the water is heating up. Peel the outer leaves of the brussels sprouts and slice the end off. Once the water is boiling, add the brussels sprouts in and boil for 3 to 4 minutes. 


Filled up the mixing bowl up with cold water, you can add some ice to the water if you would like. Once the 3 minutes is up, strain the sprouts and then transfer them into the cold water.

While the sprouts are cooling heat up the saute pan. Slice the 4 strips of bacon into chunks and add to saute pan. Cook until crisp. Take out of saute pan and then add the butter to the saute pan and the garlic. Let the butter and garlic cook until you see the butter start to brown.

Then strain the sprouts again and slice them into fourths. Add the sprouts to the brown butter mixture. Add the salt and pepper, cook for about 5 minutes. Then add the bread crumbs and cook for an additional minute. Then put the bacon back into the pan and mix. 


I served this with some simple grilled chicken. Enjoy!


Monday, January 2, 2012

Baked Parmesan Asparagus Fries

I will be the first one to admit growing up I hated and I mean HATED asparagus. As I have gotten older my tastes changed and I have tried different recipes to get more veggies in my family's diet. My husband also hated asparagus growing up. This even got my husband eating them.


Tools:


Baking Sheet
Baking Spray
Aluminum Foil
2 Plates
Whisk


Ingredients:


1 Bunch of Asparagus 
2 Egg Whites
1/4 C Flour
1 C Bread Crumbs
1/2 C Parmesan Cheese


Directions:


Pre-heat the oven to 425°f and cover the baking sheet with the foil and baking spray.


Whisk on one plate the egg whites until combined. Then on the other plate combine the flour, bread crumbs, and parmesan and mix until combined.


For the asparagus break the woody end off and use that as a measurement to cut the remaining asparagus. 


Coat the asparagus in the egg whites then coat the asparagus with the bread mixture. If it isn't covered enough, coat in egg whites again and then the bread mixture. Then place on the baking sheet. 


Bake for 15 minutes or until golden brown. 


Enjoy!


Sunday, January 1, 2012

Breakfast Bake

I love doing breakfast for dinner, so does my family. I wanted to try something new and tasty. I decided to do a breakfast bake with lots of veggies, prosciutto, and eggs.  This dish is easy to make and really easy to use up any veggies you have before they go bad. There isn't any salt used in this recipe due to the fact of the prosciutto and gorgonzola cheese is salty enough for the whole dish. 


Tools: 


Saute Pan
Baking Dish
Spoon
Knife
Cutting Board


Ingredients:


8 oz Prosciutto or Bacon
1 Red Bell Pepper, sliced
4 Cloves Garlic, diced
2 oz Gorgonzola, crumbled
10 Mushrooms, sliced
10 oz Fresh Spinach, cooked down
6 Eggs, egg yokes and whites separated
1 tsp Black Pepper
1 Tbs Canola Oil
1 Tbs Crisco 


Directions:


Pre-heat oven to 350°f. Grease the baking dish with the crisco. Saute the spinach with 1/2 tbs oil until all is wilted down, set aside.


Saute the garlic, red peppers, and mushrooms with the remaining canola oil and black pepper, cook until peppers are soft. Set aside for assembly. 


Layer all the prosciutto on the bottom of the baking dish.


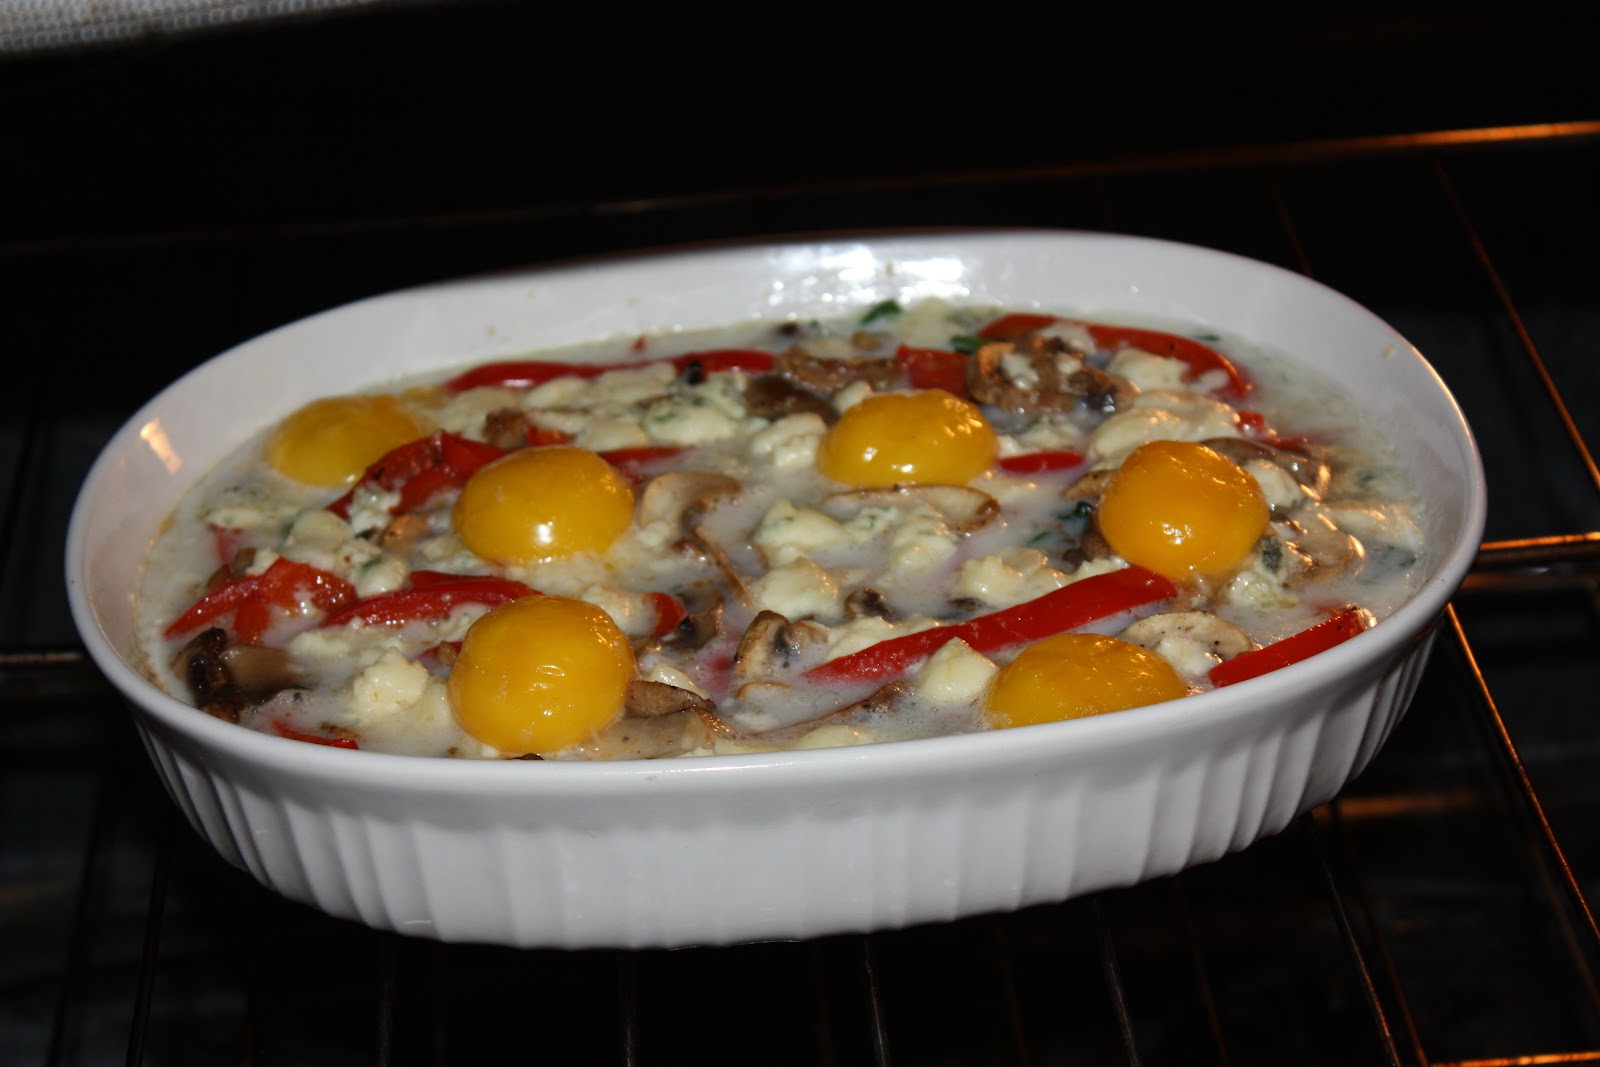
Layer the spinach on top of the prosciutto. Then layer the peppers and mushrooms on top of the spinach.Top with the gorgonzola cheese. Separate the egg whites from the yokes, keeping the yolks intact.  Whisk the whites until foamed. Pour over the veggies.


Now for the yokes when placed in the oven depends on if you want the yoke completely cooked or runny. If you want them completely cooked place them on top the mixture before putting them in the oven. If you want them runny then wait till the last 5 minutes of the 20 minute baking time to place the yokes on top of the breakfast bake. 


Serve with buttered toast. Enjoy!


Saturday, December 31, 2011

Balsamic Glazed Steak with Gorgonzola Alfredo Ravioli

I had a dish a while ago at Olive Garden that had all these components of balsamic glaze, steak, and pasta. It is wonderful and one of my favorite dishes there. I decided to make my own version of it at home. The one at Olive Garden came with fettuccine, I decided to use some fresh made ravioli I found at my local grocery store. 


Tools:


Saute Pan
Small Sauce Pan
Large Sauce Pan
Mixing Bowl
Knife
Cutting Board
Whisk


Ingredients:


1 lb of Beef Tips
1/4 C Balsamic Vinegar
2 Tbs Sugar
4 Cloves Garlic, diced and divided in half
1/2 C Milk
2 Tbs Olive Oil
2 tsp Salt
2 tsp Black Pepper
1 tsp Oregano
4 oz Crumbled Gorgonzola
8 oz Fresh Ravioli 
1 Tbs Corn Starch
2 Tbs Water


Directions:


Heat on medium high heat the saute pan with 1Tbs Olive Oil. Cook the beef tips until cooked through. Then pull the meat out of the pan and add the balsamic vinegar, half of the garlic, salt, black pepper, and the sugar. Cook until it boils for 2 minutes and then add back in the beef tips. Heat for another 2 minutes then pull off heat to thicken. 


Heat up large sauce pan filled with water until it is boiling, then add fresh ravioli in the water. Boil according to the directions with the ravioli. Drain and return to large sauce pan. 


While ravioli is boiling, in the small sauce pan add the 1/2 C milk, oregano, 3/4 of the gorgonzola, remaining olive oil,  and remaining garlic. Simmer for 5 to 10 minutes then for the last 2 minutes add the corn starch and water mixture to thicken the sauce. When the pasta is done then add the sauce to pasta and toss. Then top with the steak with balsamic glaze. Add the remaining gorgonzola on top. 


Enjoy!


Taco Salads

I love taco salads. They combine fresh veggies and wonderful seasoning together with a crunchy tortilla shell surrounding it all. I received a gift for Christmas from my sister in law that molds the tortilla's into a bowl and I made them for her birthday.  I used some tortillas and veggie I had gotten from Bountiful Baskets that had been frozen for later use. 


Tools:


Cutting Board
Knife
Saute Pan
4 Mixing Bowls or Tupperware
4 Tortilla Baking Bowls or Metal Bowl that is oven proof
Spoon


Ingredients:


1 lb Lean Ground Beef
1 Package of Taco Seasoning
8 Tortillas (if small) 4 (if large)
1 Head of Romaine Lettuce
1 can Refried Beans
4 Green Onions, diced
1 can Green Chilies
1 Package of Shredded Cheddar
1 Container Salsa

1 Container Sour Cream
1 Bottle Hot Sauce


Directions:


Pre-heat oven to 350°f. Place the tortillas into the baking bowls and place in oven to bake for 10 minutes or until edges are golden brown. You will want to check the tortilla for air bubbles and pop them if there are any. 


Brown the ground beef with the taco seasoning and place in tupperware bowl. Shred the romaine lettuce into bite size pieces and place into tupperware bowl. Heat the refried beans in tupperware bowl in microwave for 2 minutes or until heated through. 


Add whatever toppings you would like and enjoy!


Monday, December 19, 2011

Corn Chowder

I love corn chowder, it has great flavor and its wonderful on a cold winters day. I have always wanted to make corn chowder and this week I got the chance to make my version of the chowder, this is a dairy free recipe. I am using potatoes to get the creamy consistency with out the dairy in it. I participate in a co-op, Bountiful Baskets, and it provided me all the veggies and herbs for the chowder which is wonderful.


Tools:


Cutting Board
Knife
Large Pan
Blender or Food Processor
Cookie sheet 
Paper Towels


Ingredients:


4 C Fresh Corn
4 Carrots (diced)
1 Large Onion (diced)
6 Stalks Celery (diced)
4 or 5 Medium Potatoes (peeled and diced)
4 Garlic Cloves (minced)
1 lbs Bacon (diced)
48oz Low Sodium Chicken Stock
2 tsp Rosemary (minced)
2 tsp Thyme
2 Tbs Black Pepper
Salt to taste (don't use much because of bacon)


Directions:


Heat the large pan on medium high heat and put in bacon. Cook until bacon is crispy. Remove bacon from the pan and place on cookie sheet lined with paper towels. Discard all but 1 tbs of the bacon drippings. Leave the remaining tbs of bacon drippings and add all the veggies except the corn and potatoes. Saute the veggies until soft. 


Then add the chicken stock and the herbs. Then add 3 out of the 4 cups of the corn, save the the last cup to add at the end. Add the diced potatoes to the stock. 


Simmer until potatoes are fork tender then blend in a blender half of the veggies and stock. Blend until smooth.


Then add it back to the remaining half and mix until combined. Then add back in the bacon and remaining corn and stir until combined. 


Then simmer for another 5 minutes then serve. 


Enjoy!

Friday, November 25, 2011

Big Thanksgiving Post

So I hope everyone's holiday was wonderful and spent with lots of loved ones. Ours was small with just my family, mother-in-law, and sister-in-law. It was nice and relaxing, I know, I know saying cooking Thanksgiving dinner "relaxing" but it was. It was relaxing because I prepped everything before I started cooking so it would just be easy to put together. I cut up the veggies and made the dessert the night before.


So now onto the recipes, I will be posting about the Turkey, Stuffing, Gravy, Green Bean Casserole, Candied Sweet Potatoes, Mashed Potatoes,  Peppermint Cheesecake(a special diabetic recipe) and Mason Jar Apple Pie. 


Tools for all recipes:


Cutting Board
Knife
Roasting Pan
2 Large Pans
1 Medium Sauce Pan
4 Mason Jars
2 Casserole Dishes
Basting Brush
2 Medium Mixing Bowl
2 Large Mixing Bowl
Cookie Sheet
9in Springform Pan
Whisk
Hand mixer or Stand mixer 
Aluminum Foil
Meat Thermometer 


Ingredients for Turkey:


Turkey (whatever size you want)
1 C Broth
1 C Soften Butter, 1/2 C for herb mixture and 1/2 C for basting
1 Tbs Rosemary, diced
1 Tbs Thyme, diced
1 Tbs Sage, diced
1 Tbs Salt
1 Tbs Black Pepper


Directions: 


Pre-heat the oven to 325°F. Clean out turkey and set aside the neck and gizzards, which we will use in our gravy recipe. Separate the skin from the meat. Mix the soft butter with the herbs and spices. put butter mixture in between the skin and meat. Smooth over the meat. Place turkey in roasting pan with broth(any kind) and cover with aluminum foil, basting the turkey with the other 1/2 C butter every hour until done. The last 30 minutes take off the foil to brown. If you want stuffing in the turkey I have a recipe to follow. If you are stuffing the turkey you will add an extra 30 minutes to an hour of cooking. I cooked 13lb turkey and it took 4 1/2 hours. You will want to take it out when it reaches 160°F because it will continue carry over cooking while it rests.


Ingredients for Stuffing:


12 oz Dry Bread Cubes
1/4 C Butter
1 C Low Sodium Broth(any kind)
1 C Onion, diced
1 C Celery, diced
2 tsp Sage
2 tsp Salt
2 tsp Black Pepper
2 tsp Rosemary
2 tsp Thyme


Directions:


Saute celery and onions with the butter.  Combine the sauteed veggies and butter with the bread cubes. Add the herbs and broth and mix until combined. Then place the stuffing into the turkey and bake until the bird is done. If baking in a dish place in oven for the last hour of while the bird is cooking. 


Ingredients for Gravy:


Neck from turkey
Gizzards from turkey
8 C Water
2 Stalks Celery
1 Carrot
1/4 Onion, Chopped
1 Clove Garlic
1 Sprig Rosemary
4 Sprigs Thyme
3 to 4 Leaves of Sage
1 Tbs Salt
1 Tbs Black Pepper
4 Tbs Flour


Directions:


Place all ingredients except flour into medium sauce pan and boil. 


When the turkey is done strain into an a bowl, then place back into sauce pan except for about 1/4 cup of the broth. Whisk into the 1/4 cup the 4 tbs of flour then slowly add the flour mixture back into broth, continuously whisking on medium heat. Heat to a boil then let boil for 1 minute then turn of heat until ready to serve.  


Ingredients for Green Bean Casserole:


1 lb Fresh Green Beans
1 Can of Cream of Chicken
1/4 C Milk
1 tsp Black Pepper
1 Container of French Fried Onions


Directions:


Slice the green beans into bite size pieces and boil them until soft, for about 10 minutes.


Combine the soup, milk, pepper, and beans into a casserole dish. Mix in 1/2 of the french fried onions into the mixture. Place in oven while the turkey rests.


Turn up the oven temperature to 375°F and bake for 20 minutes. For the last five minutes add the remaining french fried onions on top, until brown.  


Ingredients for Candied Sweet Potatoes:


1 lb Sweet Potatoes, peeled and cubed
1/4 C Brown Sugar
1/4 C Butter
1 tsp Cinnamon
1 tsp Nutmeg
1 tsp Salt
1 C Marshmallow


Directions:


Peel, cube the sweet potatoes and boil for 10 minutes or until soft. 


Melt butter and add the sugar and spices. 


Then add the potatoes and mix until completely covered. 


Pour into casserole dish and top with small marshmallows. Bake with the green bean casserole until done. 


Ingredients for Mashed Potatoes:


1 lb Potatoes, peeled and cubed
1 Sprig Rosemary
3 Sprigs Thyme
3 Cloves Garlic
1 Tbs Salt
1/2 C Butter
1 C Milk
1 Tbs Black Pepper


Directions:


Peel and cube potatoes. Place in large pan of cold water with the all the herbs except the salt and pepper. 


Place pan on medium high heat and bring to a boil. Boil until potatoes are fork tender. Drain potatoes and remove the sprigs of herbs then remove the leaves of rosemary and thyme and place into pan with the potatoes. Add the milk, butter, salt, and pepper into the potatoes and mash until desired consistency.


Ingredients for Peppermint Cheesecake:


1 C Chocolate Graham Cracker Crumbs
2 Tbs Reduced Fat Butter
2 8oz Fat Free Cream Cheese
1 8oz Reduced Fat Cream Cheese
1 14oz Can of Sweetened Condensed Milk
1 tsp Peppermint Extract
2 Eggs
12 Peppermint Patties(if using large patties), divided 8 and 4
1 Tbs Flour


Directions:


Pre heat the oven to 325°F. In medium mixing bowl combine the graham cracker crumbs and melted butter, mix until all crumbs are coated with the butter. Press into the bottom of a 9 in spring form pan.  Then bake the crust for 10 minutes, then cool. 


In stand mixer, combine all cream cheeses and mix until smooth. Add in the sweetened condensed milk and eggs, mix until combined. Chop up 8 peppermint patties and toss in 1 tbs flour. Then mix into cheese mixture. Then add the 1 tsp of peppermint extract. Pour over crust and smooth. Then bake for 32-40 minutes or until the center is almost set. 


Cool and run a knife around the edges then refrigerate for at least an hour before serving. I like to chill overnight. Right before serving use the remaining 4 and cut in half and surround the cakes edges with them. I used the mini ones for my recipe though. 


Ingredients for Mason Jar Apple Pie:


Apple Pie Filling( you can use pre-made or make your own)
1 Pie Crust


Directions:


Pre heat the oven to 375°F. Line the 4 mason jars with the pie crust about half way up. 


Then fill with the apple pie filling. Then place a round or special design top crust on top of filling. 


Then bake on a cookie sheet for 35 minutes or until tops are brown. 


I hope you enjoy the recipes and use them through out the year!


Happy Holidays!